Monday 23 January 2017

15 Ways to Increase CPC Rates for Improving AdSense Earnings


CPC stands for Cost-Per-Click sometimes known as pay-per-click (PPC) i.e. the amount which has to be paid by the advertisers for a single click on their Ads running on your particular webpage. Consequently, it is nothing but the costs incurred by advertisers in one hand and on the other hand it is revenue for Google AdSense Publishers.

You may say that AdSense CPC (cost-per-click) rates will depends on the advertisers bidding (Automatic and Manual) for your site/blog. Accordingly, you have not directly control over the CPC rates and therefore you should have to care about some areas which indirectly helps to increase the CPC rates.

You should also keep in mind that whatever CPC rates you are seeing in your AdSense performance report is not the actual CPC that advertisers are paying for a single click. Actually, it equals to only 68 percent of actual cost-per-click rate. This is because of Google AdSense revenue share (Payments) i.e. Google kept 32% of actual revenue you have earned for displaying ads with AdSense for content. Similarly, for AdSense for search, publishers receive only 51% of the revenue recognized by Google.

Increase_AdSense_CPC_Rates

Now, the question arises what should be done by the AdSense publishers to increase CPC rates so that their AdSense Ads will fetch for revenue. Based on my personal experience, I am sharing some practical and more genuine guidelines to all of you which may help in increasing your AdSense CPC rates to earn more from Google AdSense.


In my opinion, our ultimate target should be to attract more advertisers to increase tough competition among them resulting more CPC rates they have to pay for appearing on our sites/blogs. However, you may consider following factors that may either directly or indirectly helps to increase your AdSense CPC rates:

1) Link Your AdSense Account with Google Analytics for higher CPC Rates

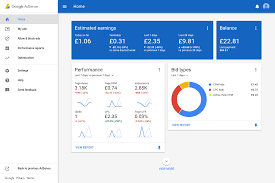
Yes, this is the latest simple trick I applied last month and got an increased CPC rates reflected in my AdSense performance report. In Google Analytics AdSense report you will find the particular webpage which gets more clicks apart from the sources generating more revenue for your site.

That means you may filter the report to find out which webpage have greater CPC rates in compare to others using MS Excel. Thus, you have to write more contents related to that particular webpage topic which have higher CPC rates. However, if you are not familiar with MS-Excel then hire me at a reasonable cost.

2) Create Custom Channel for Ad Units to increase CPC Rates

This is one of my preferred tips to increase my AdSense CPC. The main reason behind creating custom channel is to get more targeted ads for the webpage of your sites/blogs. More targeted ads means more bidders/advertisers resulting more amount of money they have to budget for paying cost-per-click by them for appearing on particular a webpage.

3) Enable both Image and Text Ads types to get High CPC Rates

Generally, there are five types of AdSense Ads viz. Text, Image, Animated image, Rich media and Flash. All those Ad types are categorized into two types one is Text Ads and another is Display Ads.

I strongly, recommend all of you to enable both Text & Display Ads types for your all AdSense Ad Units. It will increase the number of advertisers to your site ensuing higher CPC rates for them.

4) Use Higher Performing Ad Format to boost CPC rates

We always confuse about the ad sizes to be used on our blog/site so that we get increased AdSense revenue. Actually, it depends on your website layout and Ad slots you have already created for showing AdSense Ads. But, I will recommend all of you to use Leaderboard (728 x 90), Medium (300 x 250) and Large (336 x 280) rectangle, Large skyscraper (300 x 600) and for mobile webpage use mobile banner (320×50).

However, if you are using Responsive Template/Theme for your site or blogger blog then you may try for responsive AdSense Ad format which fits for all Ad spaces on your webpage irrespective of your visitor’s device.

5) Show AdSense Ads in the right place to increase CPC Rates

Well! It is very difficult to find out which place to be used for displaying AdSense Ads that result higher CPC. I opines that you should place at least one AdSense Ad Unit codes above the fold and second one just after/below the post/articles end and last one either on sidebar or footer. Please note that you should never place your all three Ad unit code in one place. Read this tutorial which may help you to find the right place for showing AdSense Ads: Insert AdSense Ad Unit codes in the right place of your Blog.

6) Use only one Advertising Network to increase CPC Rates

There are many online advertising networks like Yahoo! Bing Network Contextual Ads program powered by Media.net, Infolinks, Clicksor, BuySell Ads etc. But, you should avoid other advertising networks for better AdSense CPC rates. This is because, advertisers choose the network which costs less for them to appear on your site.

7) Visitors Location and CPC rates

In my opinion the CPC rates also depends on the location of your site users. As AdSense shows the Ads that are related to the users i.e. relevant ads shall come from the advertisers located in their country. And after analysis of my CPC rates for last one year I may conclude that advertisers coming from countries like United States, Canada, Germany, Australia, Netherlands, Saudi Arabia, United Kingdom, Spain, Albania and Iraq are paying more for a single click in compare to other countries like Thailand, Bangladesh, Colombia, France, Tanzania, Turkey, Pakistan, Sri Lanka, Nepal and India.

8) Utilize AdSense Allow and Block ads facility to get higher CPC Rates

Now, AdSense team has given a wonderful facility named ‘Allow and Block Ads’ for their publishers. Accordingly, you have now the option to choose which particular Ad is to be shown on your site. Blocking Ads will take effects within an hour.

Actually, whenever you block a particular Ad network or Ads, bidders/advertisers are informed immediately the types of ads you don’t wish to see on your website so that they only provide ads relevant to your webpage. This will increase number of bids in real time for your inventory resulting higher CPC rates. Note that blocking Ads may also impact negatively on your ultimate AdSense revenue.

9) Change the Layout of your Site to increase CPC Rates

Every website owner wants to build a site which looks totally different from other site i.e. the blog/site should be unique. Further, they also allot different slot for the AdSense Ads in accordance with their own preferred space. Many of them get confused what should be the layout of their blog that fits for Google AdSense. Google AdSense has provided a standard layout for showing advertisements and therefore you may change the layout of your site accordingly.

According to best practice for ad placement as prescribed by AdSense, the site layouts that highlight content shall be regarded as good example rather the site layout that pushes content below the fold. Thus, you should not place your all three AdSense ads above the fold. This practice may increase CPC rates for Ads that has been placed close to the content that your site visitors/users are interested in.

10) Know Your Customer to get Higher CPC rates

Know your customers/visitors i.e. ask them whether they got the things they are looking for on your site/blog. They are the real key to increase CPC as because more visitors more page views resulting more impressions and bidding price that ultimate increase the CPC rates of your AdSense Ads.

11) Niches and Keywords that affects CPC Rates

You can’t ignore the fact that Google AdSense is mainly for content ads and therefore the niche and topics of your site may impact on the CPC rates of AdSense Ads. Don’t worry you need not search for and buy the highest paying keywords. Just visit your Google Analytics account which has been linked from your Google AdSense account and under Acquisition menu click on Keyword to see the organic keywords used by users to reach your blog/site. Now, you may filter the highest CPC keywords after exporting all keyword report to MS-Excel document.

12) Write Quality Contents to boost CPC Rates

Suppose a site having lots of posts and many visitors but they are getting lowest CPC rates for their AdSense Ads in compare to other site which have not so much visitors and webpages. The reason behind lowest CPC is that the first site is doing copy paste contents from other blog/site rather their own original/creative contents.

Actually, whenever you are posting your article or contents online they are crawled by search engine like Google, Bing/Yahoo and Ask etc. And later on someone has just copy the contents from the original source without giving a credit to them.

Accordingly, most of search engines does not either prefer to index their contents or it may be regarded as low quality contents. And as an advertiser why should you bid for the duplicate contents and therefore it causes lowest CPC rates for the AdSense publishers. Hence, try to give your best for writing original and quality contents for your blog/site so that advertisers bids for getting an Ad slot on your webpage by paying highest CPC rates.

13) CPC Rates depends on your site Domain Name

Domain name of a site is one of the key factors upon which CPC rates may depends. This is because domain name tells the about the contents of your website. So, please choose domain name wisely that relates your site contents and keywords. However, it does not affect CPC rates so much as compared to other factors like quality contents and niche of your site.

14) Use Responsive Template/Theme to increase CPC rates

Yes, you have to accept the facts that now-a-days most of internet users uses their mobile/cell/smart phones and tabs instead of PC (Personal Computer) for searching and browsing the things they are interested in. And as we know that more users more ad impressions that results paying high CPC rates. Therefore, you should use responsive template for your blog or website.

15) Experiment A/B Testing

Sometimes without knowing the effect just do something new as you think fit to increase Google AdSense CPC rate. Finally, it’s upon you to make A/B testing with your sites, AdSense Ads and other factors that impact positively on the CPC rates.

Thus, you do not have to afraid of decreasing your revenue due to lower CPC rates. Just follow the above guidelines and increase your CPC rates. Please don’t forget to share your own personal experience with me and let me know if any of the above tips helps you to get higher AdSense CPC rates.


Analysis of AdSense Revenue with Responsive Screen Resolutions

In this digital world, a biggest change in mobile search results has been made on April 21, 2015 (My First Marriage Anniversary) by the apex authority of online contents i.e. Google. No one can ignore the updates made by Google as it is the world’s most popular search engine with a market share of 65.73 percent (NetMarketShare.com) as of April, 2015. Moreover, it also holds 90+ percentage of global mobile search.

Search Engine Global Market Share

Global Mobile Search Percentage

Did you know? Starting April 21, 2015, this mobile-friendly update will boosts mobile search rankings for webpages which are mobile-friendly i.e. sites which uses responsive template/theme. Thus, if you are not using responsive templates for your sites then you may lose potential customers or visitors.

Despite of the above fact if a webpage contains the high quality content (even it is not mobile-friendly), it could still rank high in SERPs. But, I don’t find any reason for not building your site for mobile users. See the screenshot of increasing trend for live mobile users of my site.


Live Mobile Visitors

From the above screenshot you notice that average 45 percent of visitors comes from high-end mobile devices.

Now come to the point that if you have approved Google AdSense account, you may earn some extra dollars by showing advertisements in your multi-screen websites. I have managed to make all my client’s blog/site responsive and during the implementation, I got some relevant points which may help you to increase your AdSense income.

Accordingly, I am discussing with all of you some relevant points relating to responsive websites and AdSense earnings. So, please read the following AdSense multi-screen strategies and boost your AdSense earnings:

1) Make Your Site Responsive for all device

As I already explained it very clear with all of you that if your site is multi-device supported, you will get at least 1/3 extra visitors for your site. And you know the simple thumb rule that-

More Users = Additional Impressions = Extra Earnings.

To make your website responsive, please analyse your Google Analytics data and choose the proper resolution for your site. It helps you lot to know which screen resolution is used by your site visitors.

Step-1: Login to your Google Analytics account and navigate the Reporting (Top Menu) linked to your website.

Step-2: Click on Technology (Browser & OS) under Audience sidebar menu.

Step-3: On the displayed report you will see the name of browsers used by visitors to your website along with various data in different columns.

Step-4: Click on Screen Resolution from the Primary dimension (see screenshot below) to get screen resolutions of your site users in descending order.

Analytics Screen Resolution Report

Now, you will be able to decide which media screen query should be used to create your site’s responsive template in more effective manner and dynamic ways. However, if you are unable to decide best screen resolution for your website, please contact me for further help.

2) Maximum Allowed AdSense Ads in a Responsive Site

This is very important phase because I personally notice that most of my clients makes mistake unknowingly and they never realise its bad impact on their AdSense earnings. Moreover, it may boost your earnings if followed properly otherwise may result in disabling your AdSense account.

Take an example of a blogger who have a WordPress/Blogger blog. He has started his blogging career by using either a simple or responsive template/theme in his WordPress/BlogSpot blog. After sometime he got his Google AdSense account approved for his site and place the AdSense Ad Unit code into templates.

He know very well that he can only place upto THREE standard ad unit in his site besides up to THREE link units and TWO search boxes. Hence, he can insert upto 8 AdSense Ad unit codes into a single webpage. But, he does not know the fact that only ONE large (i.e. 300×600, 300×1050, 970×250, 750×200 and 580×400 etc.) ad unit is allowed per webpage.

Additionally, he also missed the Ad limit per page for mobile sites. As per Ad implementation policies of Google AdSense, you may not display two or more AdSense ads on the screen at the same time on a mobile site. That means you are not allowed to place more than one standard ad unit for each and every page of your mobile friendly blogs/sites.

In other words, you may insert maximum 1 AdSense for content units, up to 3 link units and up to 2 search boxes in your mobile sites. But, I recommend all of you to place only ONE AdSense for content units and ONE link unit code and ONE search box into your mobile sites. If, you want further clarification make your comments and opinion below.

3) How to show AdSense Ads in your Multi-Screen site

Those website owners who uses separate sites for mobile and desktop users may easily comply with the Ad implementation guidelines of Google AdSense by inserting Ad unit code in accordance with the limit specified. However, if you are using responsive template for your website then you have to make some extra efforts for your mobile optimized (multi-screen) websites.

After the above discussion, I think you are now familiar with the restrictions made by Google AdSense for showing Ads in your mobile sites. Now, with the help of some HTML and CSS codes we will be able to comply the policy of Google AdSense. Here is the step by step guidelines to show AdSense Ads in your mobile supported sites:

Step-1: Login to your AdSense account and create Ad Unit.

Step-2: Paste your AdSense ad unit codes into Ad slot in your site by adding the following div class along with your all AdSense ad unit codes.

<div class="swtads adsformobile">
Replace this line with your AdSense Code
</div>
After successful adding the div class your ad codes will looks something like this:

<div class="swtads adsformobile">
<script async src="//pagead2.googlesyndication.com/pagead/js/adsbygoogle.js"></script>
<ins class="adsbygoogle"
style="display:block"
data-ad-client="ca-pub-xxxxxxx"
data-ad-slot="xxxxx"
data-ad-format="auto"></ins>
<script>
(adsbygoogle = window.adsbygoogle || []).push({});
</script>
</div>
Now, remove the term “adsformobile” from the particular AdSense Ad Unit code which you want to show for your mobile users.

Step-3: Finally paste these CSS codes into your website so that your multi-screen sites will display only one AdSense Ad for mobile visitors.

.swtads{ margin:1em auto;
clear:both}
@media only screen and (max-width:500px){
.adsformobile {display:none}
}
The above code will add some extra margin below and above Ads and prevent to displaying more than one AdSense ads for mobile visitors. Make your comments below to know more about these codes if you have some query.

4) How to see the AdSense Earning Report for Responsive Sites

After successful inserting AdSense Ad Unit Code into your multi-screen sites, you may now want to know the earnings from all platforms viz. Desktop, Tablets and mobile devices. There are two options to see the earning reports for your responsive sites.

4A) AdSense Earning Report through AdSense Account

Login to your AdSense account and click on Performance report menu from the top. Now, choose Platforms from the drop down options next to the report type as shown in this screenshot.

AdSense Earnings Platforms Report

4B) AdSense Earning Report through Google Analytics Account

The best part of this report is that you will be able to see which particular Webpage, City, screen resolution, Source/Medium, Hostname, Day/Time and Browser etc. is performing well for increasing your AdSense earnings.

Thus, follow these steps to see the detailed reports of AdSense Ads Clicks, revenue, CTR, eCPM, Impressions and page impressions etc. for your responsive websites. Note that to see your AdSense report through Google Analytics account you should have to link your AdSense and Analytics Properties. If you have not yet linked the same, please link the both account or contact me for help.

Step-1: Login to your Google Analytics account

Step-2: Click on the Reporting top menu

Step-3: Now, click on Behavior from the left sidebar menu and then select AdSense Pages under AdSense sub-menu. This will show you which webpage of your site performs well for your AdSense Income. You may also choose Overview or AdSense referrers for your earning reports.

Step-4: Click on All Sessions and click on check box to select any particular session for which you want to see the AdSense earnings and then Apply it.

There are about 21 different sessions available in the Google Analytics account viz. Bounced Sessions, Converters, Direct Traffic, Made a Purchase, Mobile and Tablet Traffic, Mobile Traffic, Multi-session Users, New Users, Non-bounce Sessions, Non-Converters, Organic Traffic, Paid Traffic, Performed Site Search, Referral Traffic, Returning Users, Search Traffic, Sessions with Conversions, Sessions with Transactions, Single Session Users, Tablet and Desktop Traffic and Tablet Traffic.

Most of my clients want to know their AdSense earning reports from the sessions, I already bold the same. But, I personally recommend you to analyse all sessions as because it will help you a lot to make analysis and future decisions for increasing your revenue from AdSense Ads.

Step-5: Click on the AdSense Revenue and select any option to Explore the AdSense earnings accordingly. Through this option you will be able to explore the report of AdSense Ads Clicked, AdSense CTR, AdSense eCPM, AdSense Impressions etc.

Step-6: Click on the Secondary Dimension and select any dimension for which you want to see the earnings report. There are 8 dimensions viz. Acquisition, Advertising, Behavior, Custom Variables, Ecommerce, Social, Time and Users. For better option just click on the check box to display dimensions as alphabetical list.

Hence, you will now see and analyse the AdSense earnings with your responsive screen resolutions.


Display Affiliate Ads or Related Contents to AdBlock Users

If you are regular visitor of my site then you know very well that I pick up a most relevant query from Frequently Asked Questions (FAQs) of my users on regular basis. One of my site visitors asked me to show advertisements in his website in case where the AdSense Ads are blocked by Ad Blocking software installed in browsers.

Accordingly, I will today discuss a very hot topic with all of you which may boost your monthly earnings from your websites without affecting user experience and violating AdSense policy.

What is Ad Blocking Software or Browser Extension?

Ad blocking software/ extensions are used to hide or disable automatically all types of advertisements on every web pages including Blogger/ WordPress blogs, YouTube, Facebook and others. Some of most popular ad blocker blocks malware domains, social media buttons and even the tracking system of websites and as companies. Thus, AdBlock makes all commercial communication disappear from webpages.

Well known Ad blocking Google Chrome browser (world’s most widely used) extensions are AdBlock, AdBlock Plus, AdBlock Pro and uBlock Origin etc. Additionally, an increasing trend of blocking ads on High-end mobile devices like Android have also been seen on Firefox and chrome which leads 90% of mobile space and if you are using iOS 9 you will find an option to block ads.

Did you know? Visitors to Gaming, Social Media, Tech/Internet and Education websites are significantly more likely to block Ads in compare to other niche websites like government.
Who are Ad Blockers? Why they block online advertisements?

Visitors of any site who block ads by using different means like VPNs or DNS solutions or Ad blocking plugins are ad blockers. I think the main reason behind hiding or removing advertisements is to protect personal data from being accessed/ misused by websites/ third parties.

Apart from securing private information, an increase in the number of online ads also play a big role behind blocking such annoying text/reach media ads. In other words, people are fed up with lots of advertisements on their screen.

Some ads may be downright dangerous for PC and may slow down the web browsers and therefore people are smart enough to block those ads in front of their face. And moreover, you can’t ignore the fact that most of ads are not relevant to the topics for which the users actually visited the particular blog/site either through organic search results, social media or even directly. Accordingly, they don’t click on that type of digital advertisements.

Loss of Revenue by Website Publishers due to Blocked Advertising

If you are running a blog/website and earning money through online contents on your sites you may losing a significant revenue due to blocked advertisements. As per recent ad blocking report on “The cost of ad blocking” published by PageFair in partnership with Adobe, there are currently 98+ million active adblock users around the world and the global cost of ad blocking is expected to be $41.4 billion by 2016.

Google AdSense.com and ByeSellAds.com are two top and the leading advertising companies on this digital planet and therefore most of website publishers belongs to these companies.

How to see actual Revenue Loss due to Ads blocked on your Sites

It is very difficult to see the actual loss due to ad block users visiting on your websites. However, you may estimate the same through different means and methods. I am giant lover of all products of Google and therefore using Google Analytics to monitor and analyze traffics to my all websites in real time. If you are an AdSense publisher then you may also estimate the revenue loss due to AdBlock users of your site by comparing page views with and without AdSense impressions:

A) Total Pageviews: Google Analytics displayed the total number of pages viewed by all visitors of your site. Note that repeated views of a single page are also counted which is really important for us.

Reporting » Audience » Overview

B) AdSense Publisher Monetized Pageviews: In Google Analytics you easily see the total number of monetized pageviews i.e. webpages where ads from your linked AdSense publisher account is displayed. Note that a single page can have multiple ad units. You will notice that AdSense ads viewed pages are significant less than the total page views.

Reporting » Behavior » Publisher » Overview

C) AdSense Publisher Revenue from Monetized Pageviews: You will also see your AdSense earnings from the monetized pageviews on the same page as stated above.

Hence, you may now calculate pageviews without showing AdSense ads and the estimated loss of earnings as well for any particular period.

Earnings per page view = C/B

Pageviews without AdSense Earnings = A-B

Estimated Loss of AdSense Revenue = Pageviews without AdSense Earnings × Earnings per page view.

I analyzed the data of one of my clients and you don’t believe that he was losing an estimated 37% of his revenue due to ad block users of his WordPress blog. I know it hardly matters for those who does not depends on online incomes but if you blog for living or the only source of income is ad revenue from your sites, you can’t tolerate it right! In fact no one provide you anything for free without any intension behind in this commercial minded world.

What should be strategy for online Earners with respect to Ad Blockers?

Well this is a totally personal decision of each web publisher. Generally, there are mainly five options in front of you as webmaster:

A) Redirect Ad Blockers: Well! Some web publishers believe in redirecting elsewhere to all people who uses ad blocking extensions in their browsers. In other words, you may restrict ad block users to see your online contents with the help of jQuery and JavaScript codes.

In my opinion this is the worst approach followed by website publishers which may affects user experience and decrease traffics to your site. You are showing that your site has been built for advertisements only. Moreover search engine see your pages as it appears for the general people and therefore you may lose organic traffics as well.

B) Ask visitors to whitelist: You may ask your site users politely to whitelist your website. In other words, you may alert your visitors by notification and ask them to disable ad blocking apps for your site. This approach is not so much effective as because who cares about anyone and moreover the first time visitors may leave your site immediately.

C) Demand some dollars: This is another approach where webmasters demand some amount from users to view website without any ads for a particular period or lifetime. However, it may not work for most of publishers as there are many more websites who provide similar contents like your blog/site.

D) Do nothing: In this approach webmasters leave the ad blocked webpages as it is. Oh! You are thinking that any action shall not generate much revenue for them. But, think in a positive way that if ad block users finds your site contents reliable and interesting they may share it on social media and with their friends which results more traffic to your site and it is very possible that you may get a new user who does not use ad blocking software or plugins.

However, some webmasters treat this approach as running a restaurant where say 25% of customers eat amazing costly foods in accordance with their choice but pay nothing.

E) Show Alternate Contents: In today’s scenario this is the most effective approach for website owners. This is because they display alternative contents in the same slot/place of ads which has been blocked by AdBlocking plugins or apps.

How to display Alternative Contents for Ad Block Users?

As I already told that this is most effective ways to deal with ad block users. But, one thing you should not forget that ad blockers actually not willing to see advertisements in your sites. If you are AdSense publisher then you must comply the AdSense policy. Therefore, you should care both advertisers as well as your users while monetizing your online contents on ad blocked webpages.

Moreover, you may find many online tutorials which provides code to display alternate contents for ad block users in the same slot where Google AdSense ads appears. But, you should think twice before using any code to show different ads in place of Google AdSense as most of cases webmasters directly or indirectly modify the AdSense codes which is against the AdSense program policy.

Affiliate Ads or Related Contents to AdBlock Users

Accordingly, I have written this code after taking into account the interest of both users of website publishers as well as Google AdSense program policy. Following are some unique features of this code:

1) This code will wait for 5 seconds after loading all elements of your webpage and thereafter it start functioning to check whether any Ad blocking software installed by users or not.

2) It will not change or modify your AdSense Ad Unit code in any manner and therefore you will fully adhere to the AdSense programme policies.

3) You are free to show either text messages, image banners, affiliate ads, relevant tutorials/posts from any blog/site and anything you like including social media and videos to be appear in your ad container.

4) You have freedom to display these ad banners at any place in accordance with your own choice by placing just a simple div tag.

5) You can place as many as you like the different ad banners or relevant contents which will be shown randomly basis on each ad blocked webpage.

Follow these simple steps to display random alternate contents for ad block users:

Step-1: Copy and paste these JavaScript codes before the closing </body> tag of your website.

<script>
window.onload = function(){setTimeout(function(){var swt = document.querySelector("ins.adsbygoogle");if (swt && swt.innerHTML.replace(/\s/g, "").length == 0) {var RandomAdBanners = [

'YourDirectAd1',
'YourDirectAd2',
'YourDirectAd3',
'YourDirectAd4',
'YourDirectAd5'
];
document.getElementById("AdBanner1").innerHTML = RandomAdBanners[Math.floor(RandomAdBanners.length * Math.random())];
document.getElementById("AdBanner2").innerHTML = RandomAdBanners[Math.floor(RandomAdBanners.length * Math.random())];
document.getElementById("AdBanner3").innerHTML = RandomAdBanners[Math.floor(RandomAdBanners.length * Math.random())];
}}, 5000);};
</script>
Step-2: Replace YourDirectAd1 to YourDirectAd5 (line number 4 to 8) with your own text message or/and ad banner/affiliate links: Following examples may help you to understand you better for showing alternate contents for your Ad Block users.

Example-1: For Simple Text Message.

Hey! Show your love. Please whitelist superwebtricks.com or disable AdBloker Plugin/extension for our site.

Example-2: For Affiliate Ads or Direct advertisements

<a href="http://www.superwebtricks.com/connect/infolinks" title="Earn Money from your Online contents"><img src="http://img.superwebtricks.com/files/infolinks.jpg" alt="Earn Money Online" width="468" height="90" /></a>

Example-3: Display relevant posts from any webpage including your own site.

<a href="http://www.superwebtricks.com/blogger-beginner-guide/facebook-page-wordpress-plugin/" title="Install Showeblogin Facebook Page Plugin widget in WordPress"><img src="http://img.superwebtricks.com/files/Activate-Showeblogin-Facebook-Page-Plugin.png" alt="Earn Money Online" width="300px" height="250px" /></a>

Example-4: For embeding YouTube videos for Ad Block Users

<iframe width="560" height="315" src="https://www.youtube.com/embed/mo8FMRZgH5I" frameborder="0" allowfullscreen></iframe>

Example-5: For asking donation or demanding/ charging money from live ad blockers.

Did you enjoyed this post? Say thanks by making a small <a href="https://www.paypal.com/cgi-bin/webscr?cmd=_donations&business=spsmiter@gmail.com&item_name=Showeblogin%20Free%20Services" title="Donate Now and Support Us" target="_blank">Donation</a>

I have only given the option to place upto 5 alternative contents/ affiliate ads but you may increase/decrease the number of such direct advertising banners as per your preference. However, if you have not any affiliate or direct advertisement, I strongly recommend you to show posts from your won site as it may reduce bounce rate and increase user experience.

How to Display non-random direct Ads for AdBlock
One of our user asked me through comment that whether it is possible to display non-random ads. Yes! You may show fixed direct Ads. Accordingly, if you want to display non-random or fixed alternative contents to ad blockers in any one or all ad spaces/slots you have to replace the codes which represent the particular ad slot where you want to display non-random affiliate/direct ads.

Suppose you want to display non-random alternative content in only FIRST Ad Slot (AdBanner1) then replace the following codes (line 11)

document.getElementById("AdBanner1").innerHTML = RandomAdBanners[Math.floor(RandomAdBanners.length * Math.random())];

with the following codes

document.getElementById("AdBanner1").innerHTML = "NonRandomAds";

Now, replace the term NonRandomAds with your own alternative contents or direct ads as depicted in the examples given above. Similarly, you may show fixed affiliate or direct ads to all of your ad spaces. If you face any problem then feel free to ask the same through comments below.

Step-3: Finally, you have to place the following div tags where you want to display the direct/affiliate ads:

First Ad Slot: Place <div id="AdBanner1"></div> in the 1st ad space where you want to show your direct ads.

Second Ad Slot: Place <div id="AdBanner2"></div> in the 2nd ad space where you want to show your direct ads.

Third Ad Slot: Place <div id="AdBanner3"></div> in the 3rd ad space where you want to show your direct ads.

Please note that I have limited the Ad Banners up to 3 which is the maximum (Ad limit per page) allowed AdSense for content units on each page.


Stop Invalid Click Activity by AdSense Site Authorization Feature

Are you confident that you are following AdSense program policies? Are you sure no one using your ad code in websites that violates AdSense program policy? Are you getting revenue from all clicks? If, yes you should ignore this tutorial. If NO, please read these guidelines which may protect your AdSense account and avoid lost revenue.

We all know very well that in order to protect the advertisers, publishers and users at large Google treats policy violations and invalid clicks very seriously. I had already discussed program policy of Google AdSense and mentioned some examples about the invalid clicks and impressions in that tutorial.

Many publishers got their account disabled due to invalid click activity even they don’t know the exact reason behind that and not personally involved in it. It may be due to invalid clicks generated from the sites they don’t own and never place their AdSense Ad Unit codes into other blog/website or webpages.

That means someone might have copied your Google ad code and placed it on sites that does not comply AdSense policy. It may be the case that your site’s webpages have been shown within HTML Iframes. In some circumstances a publisher duplicated (copy and paste) your articles/posts into his blogs/sites.

Accordingly, you may get a notification message from Google as shown below:


“Your ads have recently appeared on websites you haven’t authorized. To avoid lost revenue, make sure to authorize any sites where you display ads by visiting your account settings.”

However, there are many other reasons for getting few impressions to sites that you have neither direct control nor your ad code is presently there. It may be due to serving your sites and webpages through other site’s server. For example search engines (Google, Yahoo, Bing etc.) served your contents searched results as cached pages through webcache.googleusercontent.com, translate.googleusercontent.com and cc.bingj.com/cache.aspx etc.

Moreover, Google may in rare cases send you a warning message to alert you that invalid activity found related to your AdSense account and ask for taking immediate action from your part to bring your AdSense account into compliance with AdSense program policies.

Here is an example of warning message from Google AdSense:

Affected website: example.com
Example page where violation occurred: example.com/example-page-url
Action required: Please make changes to your site within 3 business days.
Current account status: Active

Violation explanation: Publishers may not place ad code, search boxes, or search results alongside content which violates the AdSense program policies. This includes any inappropriate content which might be shared dynamically via live chat, instant messaging, or auto-refreshing comments.

Action is required to bring your AdSense account into compliance with our AdSense program policies. Please make changes to the above site within 3 working days. If you do not make changes to bring your site into compliance, ad serving may be disabled to the website listed above.

In this case your account may be reinstated by AdSense team after reviewing your circumstances if you makes necessary changes as may be required. And thereafter within 48 hours ads start running on your website as earlier.

Prevention is always better than cure. So, how to prevent such things which are not under your direct control and happening without your knowledge. There is a unique feature in your AdSense account named as Site authorization which prevent third party to use your AdSense Ad Unit codes without your permission. Thereafter, even if anyone is using your ad code to harm you it does not affect your account.

How to use Site Authorization to Display AdSense Ads

Step-1: Sign in to your AdSense account.
Step-2: Click the gear icon from top right and select Settings.

AdSense-Account-Settings

Step-3: From the sidebar, click on Access and authorization.
Step-4: Now, check the box marked Only allow certain sites to display ads for my account.
Step-5: Finally, enter the URL of the blogs or websites that you want to authorize, then click the Save button.

AdSense-Site-Access-and-Authorization

Keep in mind that you should add entire domain name i.e. example.com instead of www.example.com to authorize whole site. Following rules will help to add your site URL/domain name:

A) If you enter subdomain.domain.com then it only authorizes:-
subdomain.domain.com
subdomain.domain.com/pages

B) If you enter www.domain.com then it only works for:-
www.domain.com
www.domain.com/pages

C) If you enter domain.com then it will authorize the whole domain and sub-domain of site including the entire websites URLs:-
domain.com
domain.com/pages
www.domain.com
www.domain.com/pages
subdomain.domain.com
subdomain.domain.com/pages


Therefore, if you have blog on Blogger (BlogSpot) then use yourblog.blogspot.com and ignore http:// and www. However, if you are using custom domain then enter that domain name as example.com.

Within 48 hours the URLs you have entered will become the only authorized sites to show ads through your publisher ID. Note that all sites that you have added to your list of authorized sites will also be added to your Owned sites list.

All those site which have not been authorized by you may generate some impressions and clicks. But, don’t worry because it will neither affects your account nor any advertiser will be charged for that impressions and clicks.

However, if you place ad code on a site which you do not authorize will also show ads but would not generate any revenue for you. So, add each site you own and the sites/blogs you trust in the list of authorized sites to avoid lost revenue. In my opinion you should ignore all sites which are not yours.

Insert AdSense Ad Unit codes in the right place of your Blog

One of our clients asked us to choose the right Advertisement slot for their site as because they are not getting the expected AdSense earnings due to low CPC and CPM rate. After completions of site audit, we recommend them appropriate places for their AdSense Ads.

There are so many bloggers and website owners who does not care about the Advertising places that has been allotted by them for AdSense Ads. They only believe in traffics i.e. if there are more traffics to their website they will earn more from AdSense Ads.

But, their opinion shall not be accepted solely as true view. There are lots of other factors which affects AdSense earnings and displaying Ads in the right place is one of them. So, please don’t ignore it. Therefore, read the following guidelines very carefully for making the decision concerning the right place for your AdSense Ads.

A) Create Separate Ad slot for each AdSense Unit:

One of interesting thing I personally noticed on many blogs and websites that they placed their all three AdSense Ad Units codes in a single place. In my opinion they are losing potential AdSense earnings by showing maximum allowed AdSense Ads in one slot.

Note that Google AdSense programme allows only three Ad unit in a single webpage. Thus, my very first recommendation regarding right place for AdSense Ads is that you should never insert all of your three AdSense Ad Unit codes in one slot.


B) Display AdSense Ads in Head Section:

Well, this is the top performing Ad Space which can be utilized to increase clicks as well as CPM. The advertisements in this slot will gets more impressions as it displays at the top of all your site contents. The Ad sizes which will be suitable for the head section of your blog is Leaderboard (728×90) for desktop view and Banner (468×60) for tablets and Mobile Banner (320×50) for mobile templates.

However, it would be preferable for those bloggers and site owners who gets more traffics to their site. I recommend you to use your AdSense Ad Unit code in this slot if your blog gets at least 5-7k unique visitors per day.

With my personal experience, I found that this Ad section has one demerit that it will reduce your CPC rates. I don’t know the exact reason behind that but it may be due to maximum clicks and sometimes clicks without interests. It may receive invalid AdSense clicks or clicks without earnings as it renders top of your blog page.

C) Show AdSense Ads in Header:

This is the most eye catching Ad slot which generates potential AdSense revenue in comparison to the other Ad spaces. There are two Ad Spaces in the header section of your blog viz. Left side and Right side. You may choose one of them to place your AdSense Ad unit in the header section of your blog rest one may be utilised for your blog Logo and description.

Default blogger template does not provide this facility but, however, you may create it with the help of our tutorial named How to add Gadget inside Blogger Blog Header for AdSense Ads .

The best suitable Ad size for this Ad slot will depends on the size of your Ad Space. You may either use Leaderboard (728×90) or Banner (468×60) AdSense Ad Unit for header section of your blog.

D) Place your AdSense Ad Unit Codes in Blog Posts:

Google AdSense is mainly for contents based websites and if your have inserted your AdSense Ad unit codes in between your blog posts then obviously it will fetch more AdSense earnings. You can create three Ad box for your AdSense Ads in every blog posts. The first one is showing AdSense Ads above the title of your blog posts. The second and third ad slot is to displaying AdSense advertisements before the main blog post contents i.e. starting point and placing your AdSense Ad Unit codes at the end of each blog posts respectively.

If you want to insert ad codes above the blog post titles then the suitable ad size shall be 728×90 where as Large Rectangle (336×280) and Medium Rectangle (300×250) would perform better in case you choose second and third ad slots. This tutorial will help you to create and insert AdSense code in blog posts. Increase AdSense Earnings by Showing Ads in All Blogger Pages.

If you are using responsive blogger template then showing AdSense Ads at the beginning of the blogpost contents shall give you a magical positive change in your AdSense earnings. However, if your blog posts contain an image at the starting point of your blog post contents then it would be better to show the AdSense Ads above the blog posts titles.

E) Display AdSense Ads on Sidebar:

Most of blogger add HTML/JavaScript Gadget for inserting AdSense Ad Unit codes on the blogger blog sidebar. You may display either Medium Rectangle (300×250) or Wide Skyscraper (160×600) as size ads on the sidebar for better performance. Nevertheless, you should make sure that it does not looks similar to any other widgets and have some distance above and below from the other widgets contents and it does not in parallel to other AdSense Ads displayed on the blog posts body.

In my personal experience found that Display Ads (Image, Flash and rich media Ads) are performing best for Medium Rectangle (300×250) AdSense Ad size on the sidebar. However, if you have a large sidebar width enough space then, I recommend you to use Portrait (300×1050) AdSense Ad size as it covers all bidders including 300×250 and 160×600 etc.

F) Display AdSense Ads in Footer:

Generally, new blogger avoid this Ad Space but some-times I found it more important to increasing my AdSense earnings by leaps and bounds. The users of any website or blog normally comes at the end of webpage after reading the articles and blog post contents to see if there is any interesting for them and they may found interested Ads running in footer.

The best performing Ad sizes for blog footer is Leaderboard (728×90) but if your blog is responsive then you may use responsive AdSense Ad Unit accordingly.

I again repeat my wordings that just place you AdSense Ads anywhere in your blog and let your users decide which one is best Ad Space for your blog. You should give at least 1 month to decide whether a particular Ad slot is fetching more earnings in comparison to another one.

Increase AdSense Earnings by Showing Ads in All Blogger Pages

It’s not only the traffics to your Blogger Blog but you should also use some tricks and techniques to boost your AdSense earnings and one of those tips is displaying AdSense Ads in all your blogger blog pages. This tutorial will show you the simple technique to increase your AdSense impressions with the same traffics to your BlogSpot.com blogs.

Most of blogger wants to display their AdSense advertisements either before/above or after/below their blog posts. However, the way they insert their AdSense Unit code does not show Ads on all blogger pages rather it only shows on item pages or Article/posts webpage.

Accordingly, new bloggers losing their 20-25 per cent AdSense impressions or clicks as a result of which they innocently makes less earnings from AdSense than what they deserve to earn from the same traffics to their blogger blog.

So, what are you looking for, just follow these steps and boost your AdSense earnings by showing advertisements on all blogger webpages i.e. Item, Home and Static pages, Archive or Index etc. Additionally, this simple tips will also help you to show the AdSense Ads on Responsive Blogger Template including both Desktop templates view as well as mobile template view of your blogger blog.

A) How to show AdSense Ads above the Blog Post and Page Titles:

If you are not showing AdSense Ads above the webpage title then use this steps and I am sure that your AdSense earnings will drastically increase.

Step-1:
Go to the Template Editor of your blog.

Step-2:
Find ]]></b:skin> and paste the following CSS codes before/above closing ]]></b:skin> tag.

.swt-adsense-ads {/* Added by Showeblogin */
margin:1em auto;
clear:both
/* SWT Tutorial at http://www.superwebtricks.com/?p=623 */}
Step-3:
Now, find starting <div class='post-outer'> tag. You will see it twice into your blogger template. The first one is for desktop template view and the next i.e. second is for mobile template view. You will have to copy and paste these HTML codes after/below the starting <div class='post-outer'> tag.

<b:if cond='data:post.isFirstPost == &quot;true&quot;'>
<div class='swt-adsense-ads'>
AdSense Ad Unit Codes Here
</div>
</b:if>
Please do not forget to replace (AdSense Ad Unit Codes Here) with your own AdSense Unit codes.

B) How to show AdSense Ads above or beginning of the Blog Post/page contents/body:

AdSense-Ads-above-post-contents

Step-1:
Go to the Template Editor of your blog.

Step-2:
Find ]]></b:skin> and paste the following CSS codes before/above closing ]]></b:skin> tag.

i) To show AdSense Ads on the left side of your blog item contents:

.swt-adsense-ads {/* Added by Showeblogin */
position: relative;
float:Left;
margin:0 10px 10px 0;
/* SWT Tutorial at http://www.superwebtricks.com/?p=623 */}
ii) To show AdSense Ads on the right side of your blog item contents:

.swt-adsense-ads {/* Added by Showeblogin */
position: relative;
float:Left;
margin:0 0 10px 10px;
/* SWT Tutorial at http://www.superwebtricks.com/?p=623 */}
Step-3:
Find closing <data:post.body/> tag and paste the following HTML codes just above/before it. Actually, you will see <data:post.body/> in more than two places into your blogger template, the first one is for Mobile template view and another i.e. second one is for Desktop template view. Thus, paste these codes before/above the first and/or second closing post body tag of your blogger blog.

<b:if cond='data:post.isFirstPost == &quot;true&quot;'>
<div class='swt-adsense-ads'>
AdSense Ad Unit Codes Here
</div>
</b:if>
Please do not forget to replace (AdSense Ad Unit Codes Here) with your own AdSense Unit codes.

C) How to show AdSense Ads below or at the end of the Blog Post/page contents/body:

AdSense-Ads-below-post-contents

If you want to show your AdSense at the end of your blog posts and other blogger webpage then follow Step-1 and Step-2 of heading B as mentioned above and then in step-3 just paste the HTML codes below/after the closing <data:post.body/> tag instead of above/before.

Analysis of AdSense Revenue with Responsive Screen Resolutions

In this digital world, a biggest change in mobile search results has been made on April 21, 2015 (My First Marriage Anniversary) by the apex authority of online contents i.e. Google. No one can ignore the updates made by Google as it is the world’s most popular search engine with a market share of 65.73 percent (NetMarketShare.com) as of April, 2015. Moreover, it also holds 90+ percentage of global mobile search.

Search Engine Global Market Share

Global Mobile Search Percentage

Did you know? Starting April 21, 2015, this mobile-friendly update will boosts mobile search rankings for webpages which are mobile-friendly i.e. sites which uses responsive template/theme. Thus, if you are not using responsive templates for your sites then you may lose potential customers or visitors.

Despite of the above fact if a webpage contains the high quality content (even it is not mobile-friendly), it could still rank high in SERPs. But, I don’t find any reason for not building your site for mobile users. See the screenshot of increasing trend for live mobile users of my site.


Live Mobile Visitors

From the above screenshot you notice that average 45 percent of visitors comes from high-end mobile devices.

Now come to the point that if you have approved Google AdSense account, you may earn some extra dollars by showing advertisements in your multi-screen websites. I have managed to make all my client’s blog/site responsive and during the implementation, I got some relevant points which may help you to increase your AdSense income.

Accordingly, I am discussing with all of you some relevant points relating to responsive websites and AdSense earnings. So, please read the following AdSense multi-screen strategies and boost your AdSense earnings:

1) Make Your Site Responsive for all device

As I already explained it very clear with all of you that if your site is multi-device supported, you will get at least 1/3 extra visitors for your site. And you know the simple thumb rule that-

More Users = Additional Impressions = Extra Earnings.

To make your website responsive, please analyse your Google Analytics data and choose the proper resolution for your site. It helps you lot to know which screen resolution is used by your site visitors.

Step-1: Login to your Google Analytics account and navigate the Reporting (Top Menu) linked to your website.

Step-2: Click on Technology (Browser & OS) under Audience sidebar menu.

Step-3: On the displayed report you will see the name of browsers used by visitors to your website along with various data in different columns.

Step-4: Click on Screen Resolution from the Primary dimension (see screenshot below) to get screen resolutions of your site users in descending order.

Analytics Screen Resolution Report

Now, you will be able to decide which media screen query should be used to create your site’s responsive template in more effective manner and dynamic ways. However, if you are unable to decide best screen resolution for your website, please contact me for further help.

2) Maximum Allowed AdSense Ads in a Responsive Site

This is very important phase because I personally notice that most of my clients makes mistake unknowingly and they never realise its bad impact on their AdSense earnings. Moreover, it may boost your earnings if followed properly otherwise may result in disabling your AdSense account.

Take an example of a blogger who have a WordPress/Blogger blog. He has started his blogging career by using either a simple or responsive template/theme in his WordPress/BlogSpot blog. After sometime he got his Google AdSense account approved for his site and place the AdSense Ad Unit code into templates.

He know very well that he can only place upto THREE standard ad unit in his site besides up to THREE link units and TWO search boxes. Hence, he can insert upto 8 AdSense Ad unit codes into a single webpage. But, he does not know the fact that only ONE large (i.e. 300×600, 300×1050, 970×250, 750×200 and 580×400 etc.) ad unit is allowed per webpage.

Additionally, he also missed the Ad limit per page for mobile sites. As per Ad implementation policies of Google AdSense, you may not display two or more AdSense ads on the screen at the same time on a mobile site. That means you are not allowed to place more than one standard ad unit for each and every page of your mobile friendly blogs/sites.

In other words, you may insert maximum 1 AdSense for content units, up to 3 link units and up to 2 search boxes in your mobile sites. But, I recommend all of you to place only ONE AdSense for content units and ONE link unit code and ONE search box into your mobile sites. If, you want further clarification make your comments and opinion below.

3) How to show AdSense Ads in your Multi-Screen site

Those website owners who uses separate sites for mobile and desktop users may easily comply with the Ad implementation guidelines of Google AdSense by inserting Ad unit code in accordance with the limit specified. However, if you are using responsive template for your website then you have to make some extra efforts for your mobile optimized (multi-screen) websites.

After the above discussion, I think you are now familiar with the restrictions made by Google AdSense for showing Ads in your mobile sites. Now, with the help of some HTML and CSS codes we will be able to comply the policy of Google AdSense. Here is the step by step guidelines to show AdSense Ads in your mobile supported sites:

Step-1: Login to your AdSense account and create Ad Unit.

Step-2: Paste your AdSense ad unit codes into Ad slot in your site by adding the following div class along with your all AdSense ad unit codes.

<div class="swtads adsformobile">
Replace this line with your AdSense Code
</div>
After successful adding the div class your ad codes will looks something like this:

<div class="swtads adsformobile">
<script async src="//pagead2.googlesyndication.com/pagead/js/adsbygoogle.js"></script>
<ins class="adsbygoogle"
style="display:block"
data-ad-client="ca-pub-xxxxxxx"
data-ad-slot="xxxxx"
data-ad-format="auto"></ins>
<script>
(adsbygoogle = window.adsbygoogle || []).push({});
</script>
</div>
Now, remove the term “adsformobile” from the particular AdSense Ad Unit code which you want to show for your mobile users.

Step-3: Finally paste these CSS codes into your website so that your multi-screen sites will display only one AdSense Ad for mobile visitors.

.swtads{ margin:1em auto;
clear:both}
@media only screen and (max-width:500px){
.adsformobile {display:none}
}
The above code will add some extra margin below and above Ads and prevent to displaying more than one AdSense ads for mobile visitors. Make your comments below to know more about these codes if you have some query.

4) How to see the AdSense Earning Report for Responsive Sites

After successful inserting AdSense Ad Unit Code into your multi-screen sites, you may now want to know the earnings from all platforms viz. Desktop, Tablets and mobile devices. There are two options to see the earning reports for your responsive sites.

4A) AdSense Earning Report through AdSense Account

Login to your AdSense account and click on Performance report menu from the top. Now, choose Platforms from the drop down options next to the report type as shown in this screenshot.

AdSense Earnings Platforms Report

4B) AdSense Earning Report through Google Analytics Account

The best part of this report is that you will be able to see which particular Webpage, City, screen resolution, Source/Medium, Hostname, Day/Time and Browser etc. is performing well for increasing your AdSense earnings.

Thus, follow these steps to see the detailed reports of AdSense Ads Clicks, revenue, CTR, eCPM, Impressions and page impressions etc. for your responsive websites. Note that to see your AdSense report through Google Analytics account you should have to link your AdSense and Analytics Properties. If you have not yet linked the same, please link the both account or contact me for help.

Step-1: Login to your Google Analytics account

Step-2: Click on the Reporting top menu

Step-3: Now, click on Behavior from the left sidebar menu and then select AdSense Pages under AdSense sub-menu. This will show you which webpage of your site performs well for your AdSense Income. You may also choose Overview or AdSense referrers for your earning reports.

Step-4: Click on All Sessions and click on check box to select any particular session for which you want to see the AdSense earnings and then Apply it.

There are about 21 different sessions available in the Google Analytics account viz. Bounced Sessions, Converters, Direct Traffic, Made a Purchase, Mobile and Tablet Traffic, Mobile Traffic, Multi-session Users, New Users, Non-bounce Sessions, Non-Converters, Organic Traffic, Paid Traffic, Performed Site Search, Referral Traffic, Returning Users, Search Traffic, Sessions with Conversions, Sessions with Transactions, Single Session Users, Tablet and Desktop Traffic and Tablet Traffic.

Most of my clients want to know their AdSense earning reports from the sessions, I already bold the same. But, I personally recommend you to analyse all sessions as because it will help you a lot to make analysis and future decisions for increasing your revenue from AdSense Ads.

Step-5: Click on the AdSense Revenue and select any option to Explore the AdSense earnings accordingly. Through this option you will be able to explore the report of AdSense Ads Clicked, AdSense CTR, AdSense eCPM, AdSense Impressions etc.


Step-6: Click on the Secondary Dimension and select any dimension for which you want to see the earnings report. There are 8 dimensions viz. Acquisition, Advertising, Behavior, Custom Variables, Ecommerce, Social, Time and Users. For better option just click on the check box to display dimensions as alphabetical list.

Hence, you will now see and analyse the AdSense earnings with your responsive screen resolutions.